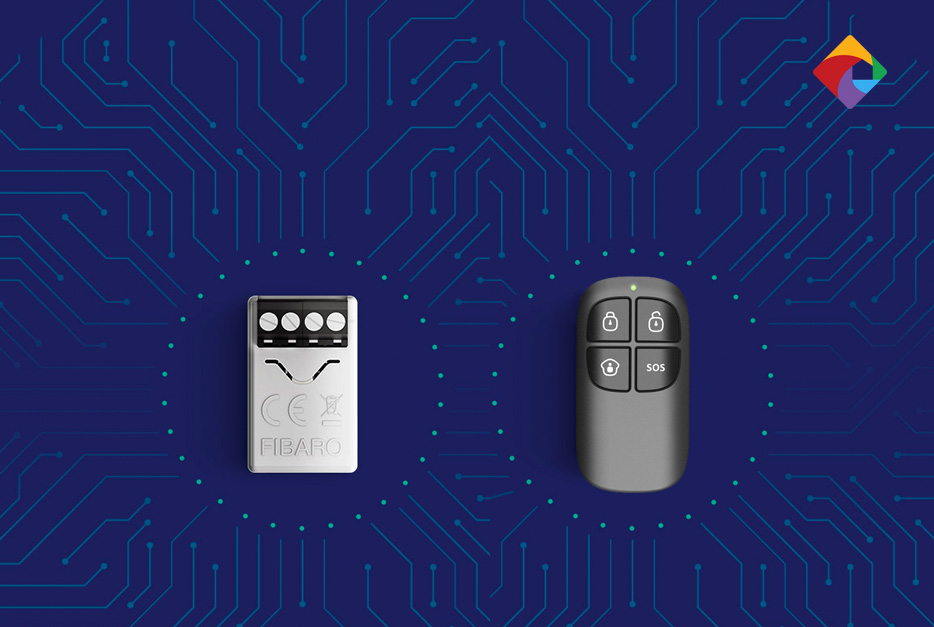
Fibaro Smart Implant
What if I told you there was a way to implant 'smarts' to your standalone alarm system, garage door & gate controller, and your heating & irrigation systems, and other beautiful vintage electronic systems?
How you may ask?
With the Fibaro Smart Implant, a little bit of tinkering and the magic of smart home technology.
What’s more, you can also use the Smart Implant to create custom sensors and devices as it also supports a variety of buttons, binary sensors, and 2-wire & 3-wire 0-10V sensors.
But for the purposes of this guide, I'll be demonstrating the Smart Implant's first use case; to convert a 'dumb' (or not-so-smart-device) into a 'smart' device. To do this, I’ll be connecting a Smart Implant to my Chuango alarm remote so I can arm and disarm my Chuango alarm system from my Home Center 2.
You can follow along to learn the general process, but keep in mind the exact nuances of the conversion process will differ according to the device. In saying this, all devices will share the following general processes to undergo the dumb-to-smart transformation.
- Hardware - Implanting the Smart Implant into the not-yet-smart-device.
- Software - Configuring the Smart Implant and Virtual Device in Home Center.
So without further ado, let’s dive in.
Important: The Smart Implant is designed for Low Voltage DC applications and is safe for DIY. It is not designed for High Voltage AC applications. You can find the specifications in the manual.

Hardware - Implanting the Smart Implant.
If you’ve read this far, you’re interested in converting a ‘not-yet-smart’ device in to a smart device. But before we get into the process, let’s get you set up with the resources you need to perform this 'minor surgery' on your electronic device.
Here’s what you’ll need:
- The Smart Implant + its User Manual.
- A soldering iron and solder.
- Tools to disassemble your 'not-yet-smart device'.
- The wiring diagram of your ‘not-yet-smart-device’ (optional).
- A multi-meter (optional).
Caution: This is an advanced DIY guide. If you do not have a working knowledge of electronics or are not confident you can perform this, do not proceed. SmartHome is not liable for any damage that may occur to your devices as a result of this procedure.
With the preparation and formalities out of the way, here’s the procedure to connect the Smart Implant to a 'not-yet-smart' electronic device or system.
- Decide on what functions of your 'not-yet-smart-device' you’d like bring in to your smart home system.
- Consult the Smart Implant manual and familiarise yourself its capabilities, electrical characterics and the wiring diagram that corresponds with your device type.
- Determine the power, ground, input and output connections required to connect the Smart Implant to your not-yet-smart-device. This can be found in your devices repair manual or through testing with a multi-meter.
- Turn off your 'not-yet-smart-device' and disconnect its power cable.
- Disassemble your 'not-yet-smart-device'.
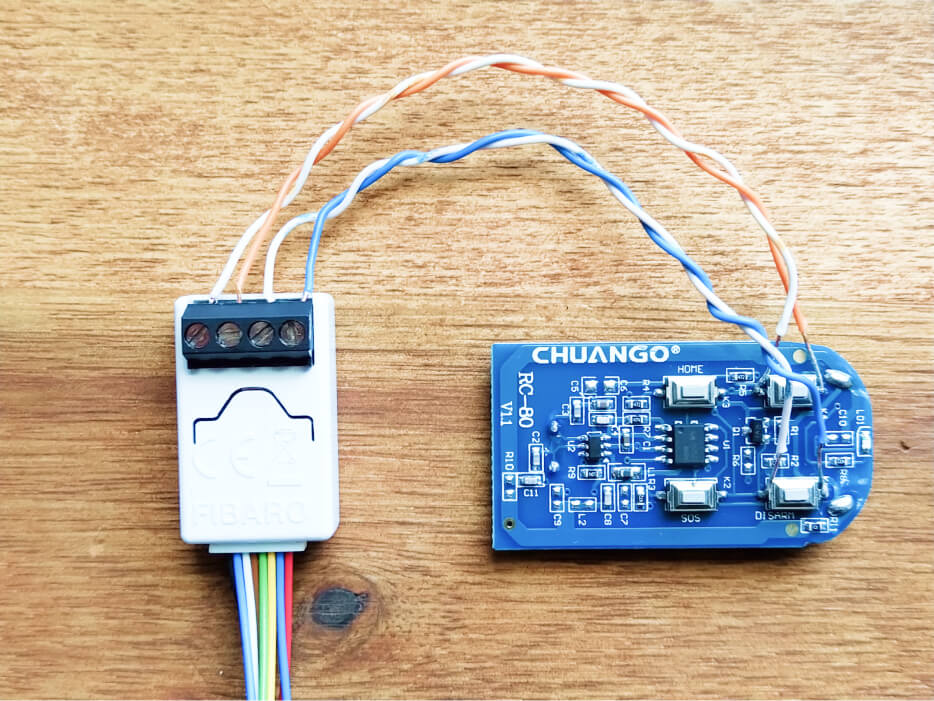
- Locate the desired connection points and dummy fit the Smart Implant wiring harness. Be sure there is enough length to mount the Smart Implant in a safe location.
- Solder the Smart Implant wiring harness to the connection points of your 'soon-to-be-smart-device'.
- Connect the wiring harness to the inputs and/or outputs of the Smart Implant.
- Check the connections have taken either by completing a pull-test or checking continuity with a multi-meter.
Software - Configuring the Smart Implant.
With the hardware component of this operation completed, it's time to set up your 'now-smart-device' in Home Center. Here's an overview of the process;
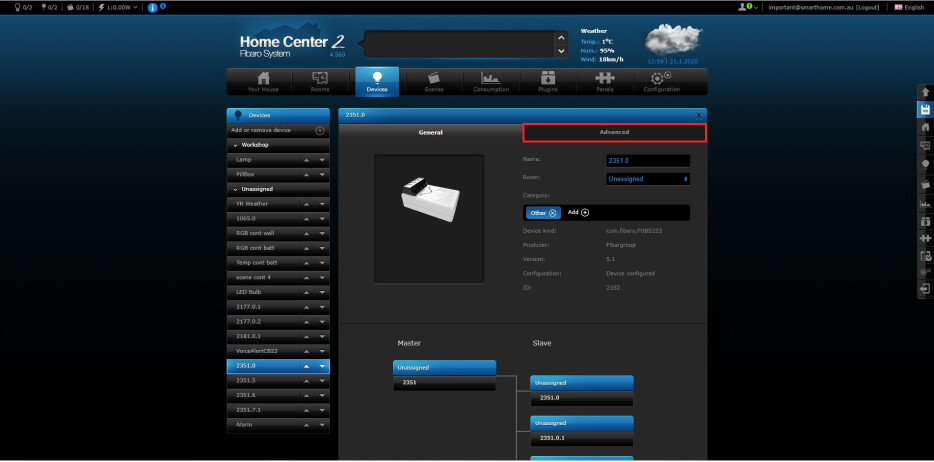
- Include the Smart Implant in Home Center through the devices tab.
- Navigate to the Advanced tab of your Smart Implant device.
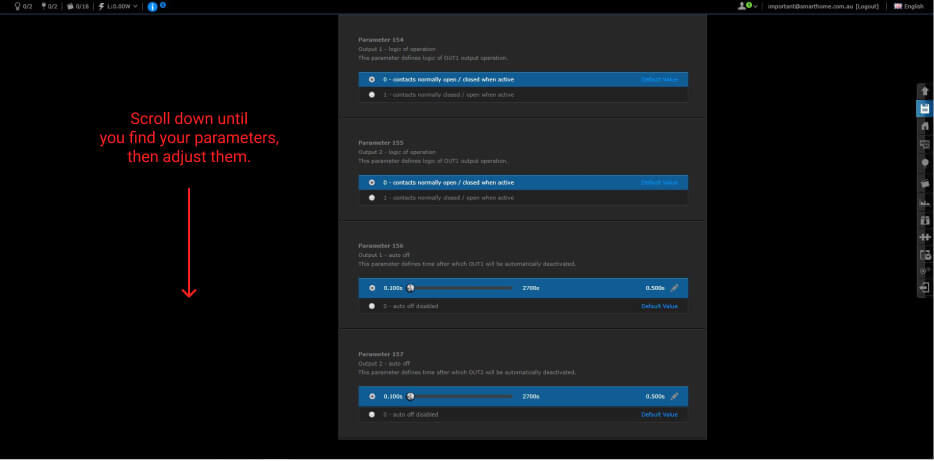
- Configure the appropriate parameters so they suit your application. You can find the parameters in the Smart Implant manual. (I configured the 'Output n - auto off' parameter to automatically turn off my Smart Implant's outputs when the alarm was armed or disarmed after a delay of 500ms). /li>
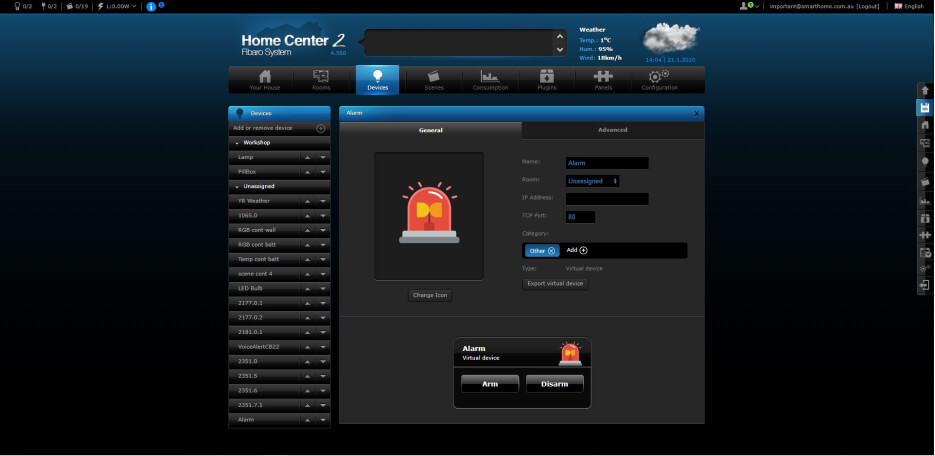
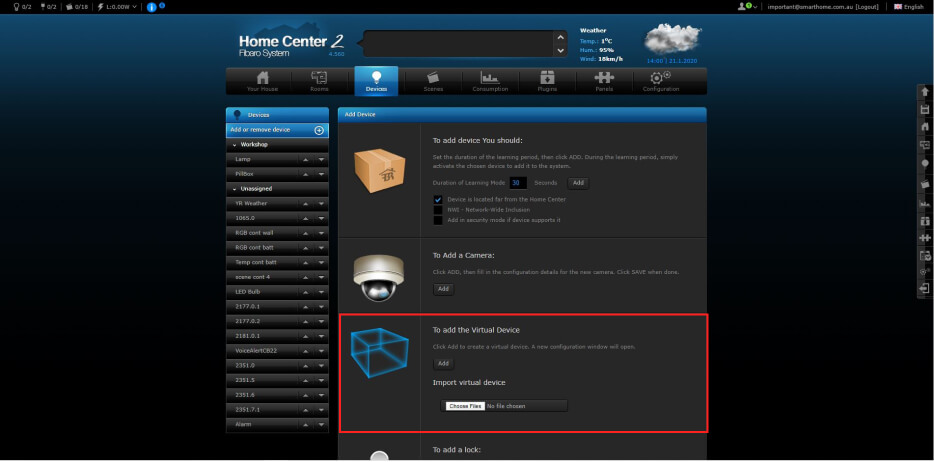
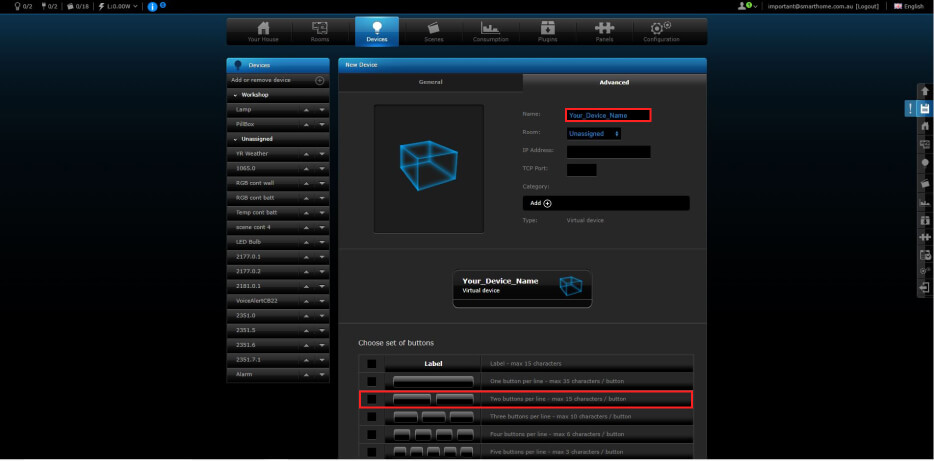
- From the devices tab, create a Virtual Device to control the 'now-smart-device' connected to your Smart Implant. Give it a name, and select the number of buttons required for your device.
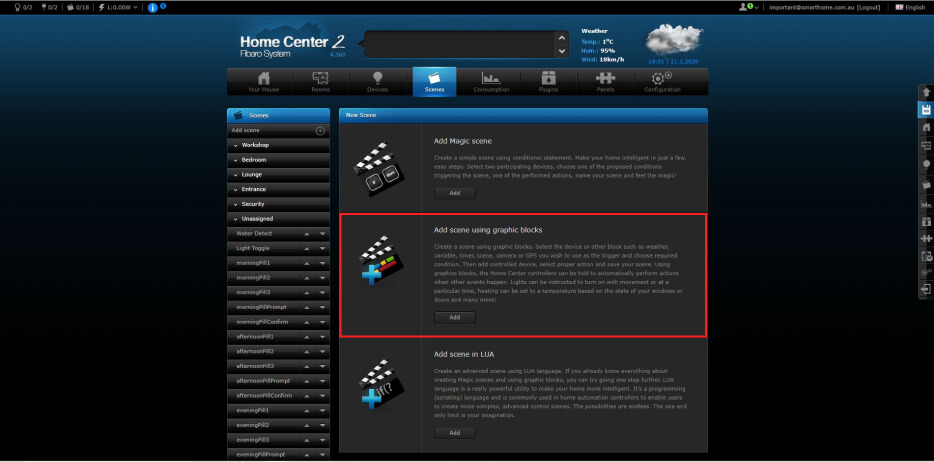
- Our Virtual Device also needs to know what action to perform when the buttons are clicked in the form of LUA code. But don't worry, we don't need to write the line ourselves. We can get the Graphical Blocks Scene creator tool to do it for us. From the scenes tab, select 'Add scene using graphical blocks'.
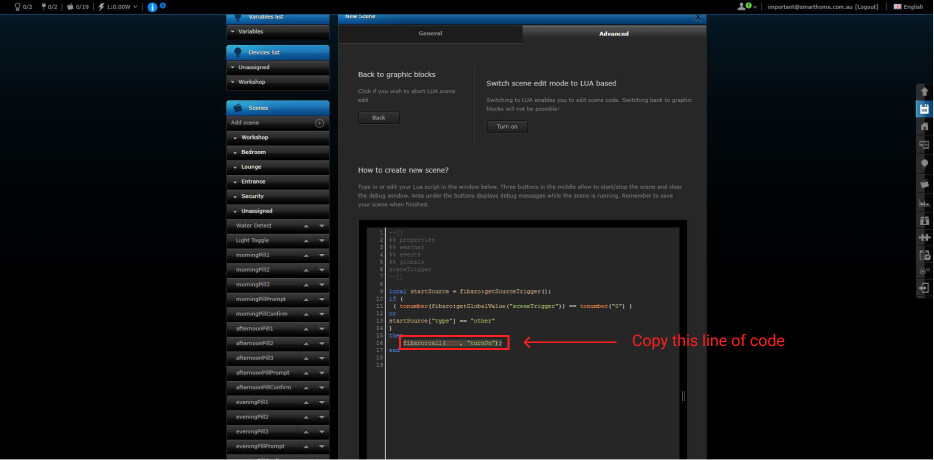
- Create a scene with your Smart Implant performing the desired function (the trigger you use doesn't matter). Then, save the scene and click the button 'Switch scene edit mode to LUA based'. Find the line that executes the action of your 'now-smart-device'. In my case, it's the line with the command to 'turn on' my device.
- Copy the line of LUA Code that executes your desired action. It will have a structure similar to; fibaro:call(deviceId, action).
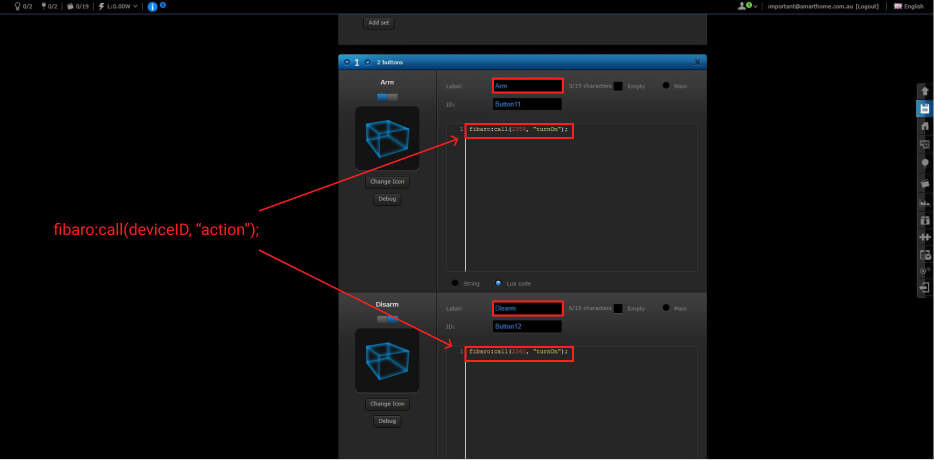
- Navigate to your Virtual Device and assign actions to the buttons. In my case, I've called button 1 'Arm' and button 2 other 'disarm'. Then switch the field to LUA code and paste in the code copied earlier. (you will need to change the device ID for each input/output of the Smart Implant. The device ID can be found by clicking on the desired devices tile. )
- Now for the final touch. Upload the icon of your choice to complete the setup of your Virtual Device. (see this guide for instructions on icons)

In Closing
Fibaro's Smart Implant is a cost-effective, versatile device capable of adding ‘smarts’ to a variety of older devices and systems. It can also be used to create custom devices with a variety of different sensors.
If you love your old devices and enjoy tinkering with electronics, it can be a fun and rewarding process to upgrade them so they can be controlled from your smart home system.
And if you have used a Smart Implant in any projects, drop a comment below. I’d love to hear what you’ve done with this clever little device!
All the best,
-Luke
home automation installation Auckland
posted on 16/09/2020 10:59 PM